As an alternative to printing a document (or page) at a time, documents may be stacked into a basket for later downloading.
![]()
To add the selected document to your basket, click on the Add to Basket link:
The Add to Basket link can be found on both the Details and the Images tab
You must allow pop-ups from this site in order to download documents
All documents are compressed or ‘zipped’ into a file prior to downloading for optimum transfer time. Please make sure you have a decompression program on your workstation
Adobe Reader is required to view/print all downloaded documents. Please go to http://get.adobe.com/reader/ to make sure have the latest version installed
Navigating the Basket
Once all desired documents have been added, click on the Basket link found on the site’s menu:
![]()
Your Basket window will display allowing you to preview the contents added:
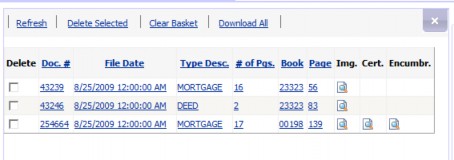
![]()
Image icons will display appropriately depending upon what type images are available for the chosen document. For example when adding Registered Land document # 254664 to the basket, the site has also “stacked” the available Certificate Image(s) and Encumbrance Sheet(s)
To remove a document (or documents) from your basket, click on the checkbox to the left of the desired row:

Once all desired documents have been “checked” for basket deletion, click on the “Delete Selected” link:
![]()
To refresh your basket contents, click the “Refresh” link:
![]()
To clear your basket contents, click the “Clear Basket” link:
![]()
To close the Basket window and return to Search, click the ![]() in the upper right hand corner
in the upper right hand corner
To download your basket contents, click the “Download All” link:
![]()
The download criteria window will open allowing you to select the document types you would like to download (site defaults to all). Check / uncheck document types accordingly:
Click Next to receive your zipped package of documents.
![]()
After selecting a desired row, the document detail will automatically display to the right of the search results in the Details tab.
Viewing Document Images
To view the associated image, click on the Images tab:
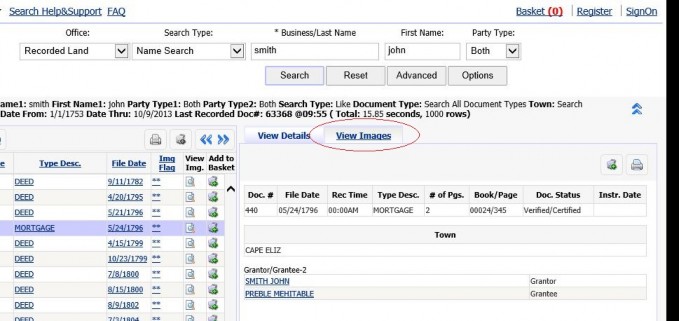
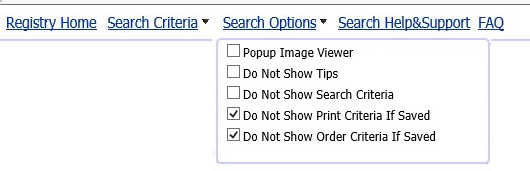
HINT: Depending upon the site’s default configuration, images will either display in the Images tab window or may automatically launch a pop-up viewer. You may change the default behavior by clicking on the site’s Search Options menu and turning off (or on) the Popup Image Viewer:
Navigating the Image Viewer
To view the first page click on the first page icon:
![]()
To view the previous page, click on the previous page icon:
![]()
To view the next page, click on the next page icon:
![]()
To view the last page, click on the last page icon:
![]()
To go to a certain page number, enter the desired page number and click the “go to” icon:
![]()
To zoom out, click the “zoom out” icon:
![]()
To zoom in, click the “zoom in” icon:
![]()
To rotate the image 90 to the right, click the “Rotate 90+” icon:
![]()
To rotate the image 90 to the left, click the “Rotate -90” icon:
![]()
To fit the image to the window, click the “Fit to Page” icon:
![]()
To fit the image to the window width, click the “Fit to Width” icon:
![]()
To fit the image to the window height, click the “Fit to Height” icon:
![]()
To undock image and open it in Popup window, click the “Undock Image Viewer” icon:
![]()
To add image to the basket, click the “Add to Basket” icon:
![]()
To print all images ot the Document, click the “Print Document” icon:
![]()
Image Panning is also available while viewing documents. Simply hold down your left mouse button while inside the image viewer and move the image in the direction of choice.
Printing Document Images
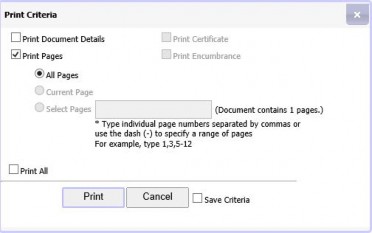
Images may be printed a page at a time, or in their entirety. The Print Criteria window will
open allowing you to select the document types you would like to print (site defaults to Print All Image Pages) as well as which page(s) within the document image. Check / uncheck document types accordingly:
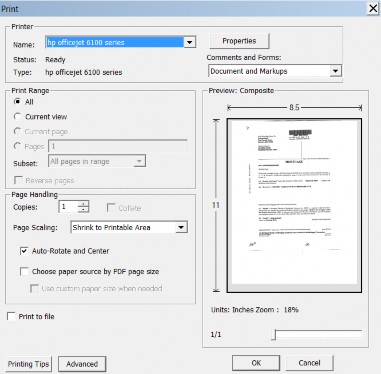
Once requested, the printer dialog will display so that you may direct all image prints to a printer of choice. This dialog is a function of your workstation and will list printers you have configured:
![]()
20/20 Perfect Vision Land Records i 2 Viewing Document Detail and Images
Page 4 of 4
The Recorded Land Name Search is the default search type. If you would like to search by Recorded Land Name Search, enter the desired criteria and click the Search button:

If you are trying to search by other criteria or by a different office, please see Searching By Different Criteria or In Another Office section below.
To narrow your search criteria, click the Advanced button:
![]()
The “Advanced” form will open allowing you to narrow the search further by adding another party, and/or by limiting by document type(s), and/or by limiting by town, and/or by limiting to a certain recorded date range:
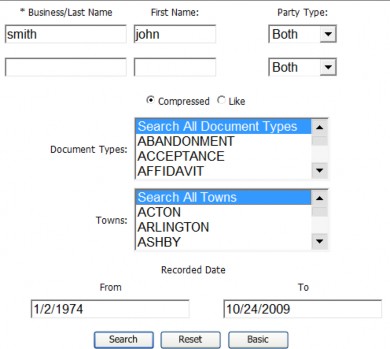
To narrow your search to Grantor or Grantee only, click on the Party Type drop down list and select accordingly
To narrow your search with a second party, enter the name accordingly:
To narrow your search criteria by Document Type(s), click on the desired document type. To select more than one document type, hold the Ctrl key down on your keyboard clicking the remaining document types. The ones “selected” should display as highlighted:
To narrow your search criteria by Town(s), click on the desired town code. To select more than one town code, hold the Ctrl key down on your keyboard clicking the remaining town codes. The ones “selected” should display as highlighted:
To narrow your search criteria by a certain Date Range, change the From and To Dates
To close the Advanced search form, click the Basic command button:
![]()
To reset the Search Form to search all available online data, click the Reset button:
![]()
Searching By Different Criteria or In Another Office:
To search by different criteria (i.e. Recorded Date range, Book range, etc.) or in another office (i.e. Registered Land, Plans, etc.) click on the site’s Search Criteria menu :
![]()
The “Search Criteria” menu will open allowing you to select from any of the configured office(s)/search templates:
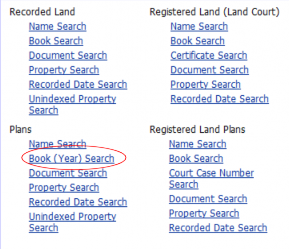
Once selected, the criteria will change allowing you to enter your desired search. For example to change search to a “Plans Book Search”, click on Book (Year) Search link and enter the desired criteria:
![]()